When developing a Shopify Theme App Extension (TAX), ensuring that it integrates seamlessly with the Shopify environment is crucial. One of the best ways to verify this is through integration testing. In this guide, we’ll walk you through setting up integration testing using Playwright, a powerful tool that automates browser testing and simulates user interactions.
Prerequisites
Before we dive in, we assume you’ve already created and set up your Shopify Theme App Extension (TAX). If not, complete that step first. We’ll also assume you have the following tools and knowledge:
Basic knowledge of Node.js
You have setup your Shopify app and relative theme app extensions
Step 1: Setting Up Your Development Environment
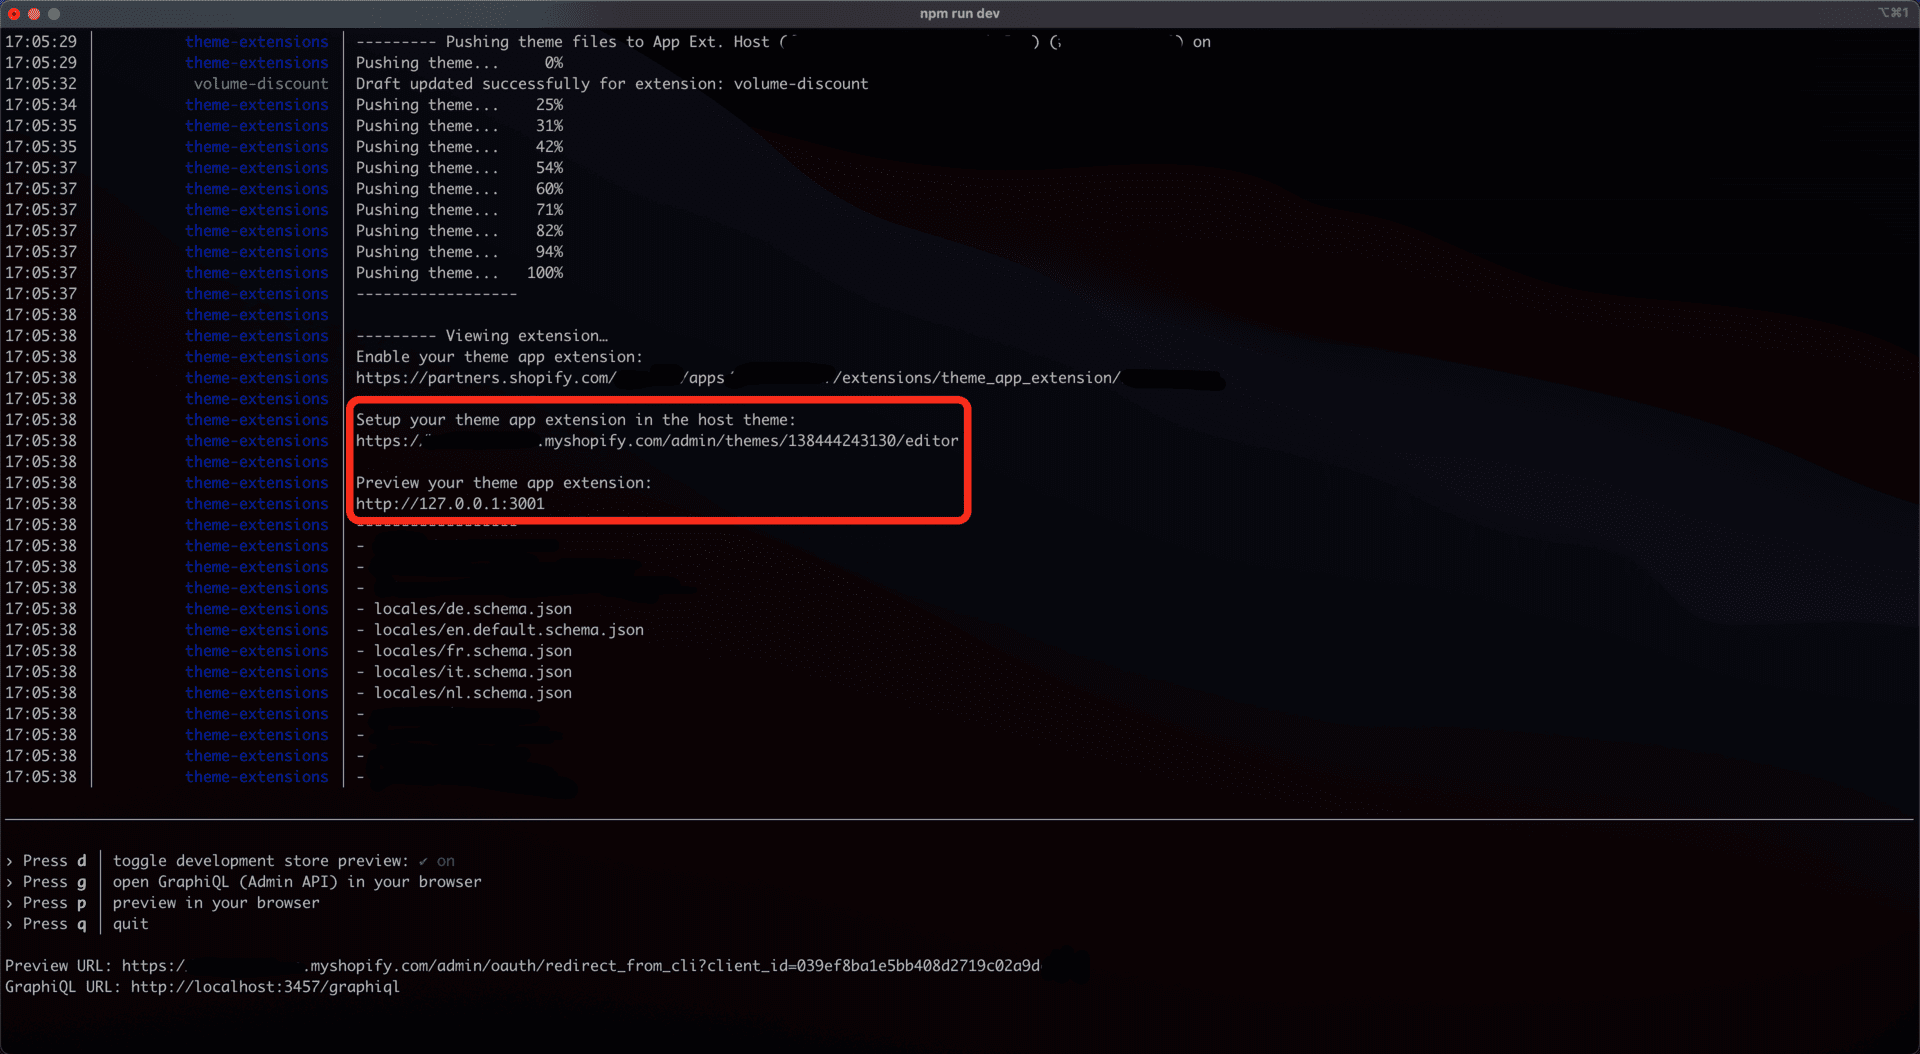
To get started, you need to spin up the local server of your app. This can be done using the following command:
This command will start a preview server of your TAX, making it accessible at http://127.0.0.1:3001. Before running your tests, make sure to activate the TAX in the host theme. Here's a screenshot to guide you through this process:

Step 2: Installing Playwright
First, ensure Playwright is installed and initialized in your project. You can do this by running:
Playwright supports testing across multiple browsers, including Chromium, Firefox, and WebKit, making it a versatile choice for integration testing, but I have only tested this setup using Chromium, so feel free to play around with it and try other browsers as well.
Step 3: Configuring Playwright for Shopify Theme Testing
Next, let’s configure Playwright to work with your Shopify TAX. Create a Playwright configuration file (playwright.config.ts) in the root of your project and configure it as follows:
In this configuration:
Setup Project: The first project bypasses the Shopify password page and stores session cookies in a file (
shopifyState.json). This file is then reused by the subsequent tests to ensure a seamless flow.Desktop Chrome Project: This project runs the actual tests using the session state set up in the previous project. The dependency should be added to all the projects besides the setup (duh). This way Playwright will first run the setup and only after it will run all the tests in parallel.
Make sure to also create the destination folder for our state by running the following commands:
Step 4: Writing Your First Test
Let’s create a setup script to handle the password bypass and session storage. Create a file named tests/myTax.setup.js:
Now, you can create a test file for your TAX, such as tests/myTax.spec.js:
Step 5: Running the Tests
With everything set up, you can now run your tests using Playwright’s CLI:
Playwright will first run the setup project to bypass the password and save the session state. Then, it will proceed to run the tests using the stored session.
Conclusion
By following these steps, you’ve set up integration testing for your Shopify Theme App Extension using Playwright. With automated testing in place, you can ensure your extension integrates seamlessly with the Shopify environment, catching issues before they reach production.
Now that you’ve got the basics down, consider exploring more advanced features of Playwright, such as parallel testing and cross-browser testing, to further enhance your testing strategy.
Additional Resources
Creating Product Bundles with Shopify Bundles App
Sep 21, 2024
4
min
Boost Your 2024 Shopify Sales with Conversion Optimization
Sep 20, 2024
10
min
How to Create Quantity Discounts Natively in Shopify for Free
Aug 29, 2024
5
min


